Molotov Cocktease Cosplay Tutorial
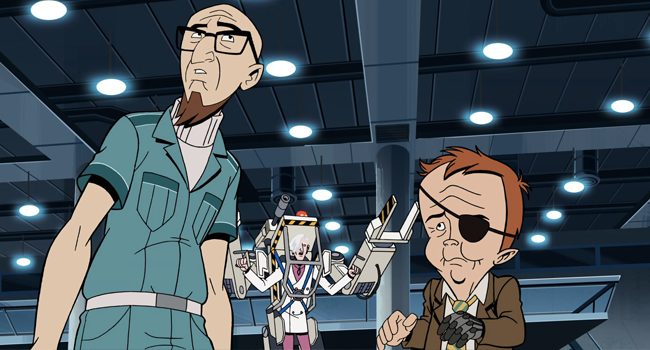
The Iron curtain has fallen but not all Soviets are ready to reveal their secrets. This certainly holds true for the angelic assassin turned mercenary Molotov Coqtiz (Cocktease, we’re not afraid to say it). Still she can keep her secrets on a great number of things but some crafty Venture Brothers cosplayers have unraveled Mol’s secret to her slinky, sprayed on cat suit.
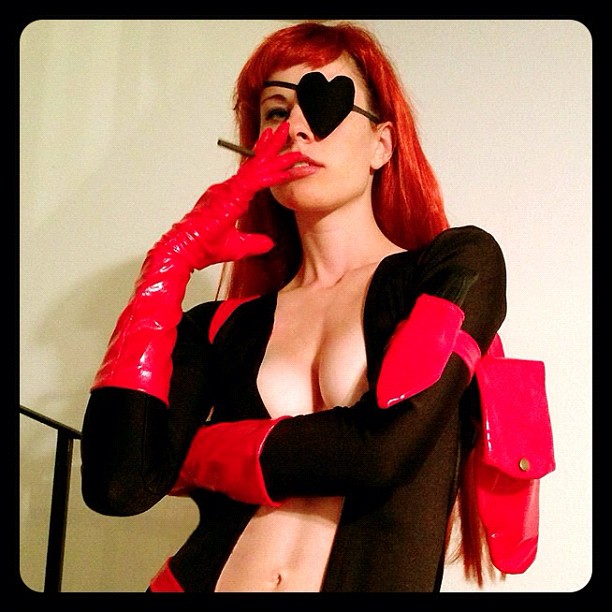
Joanie Mars, cosplayer of characters spanning multiple universes is also a huge Venture Bros. fan. Joanie’s translation of Molotov has earned her own fans so there is something to be said when the fans have fans. Start this costume out like all costumes, do your research, watch the show, take notes or better yet get screen captures of Molotov in action. Sure there may be plenty of images on the internet but they may not have all the angles you need OR give you the ability to scrutinize all the details.
THE BREAKDOWN
- Red hair – Straight and parted over the right eye
- Eye patch – Heart shaped and used on the left eye
- Black Body Suit – With a deep revealing V in the front and even more revealing V in the back
- Holsters – belt and straps. A dark red to maroon color
- Gloves – Nearly elbow length and matching the straps and holsters
- Boots – Almost knee high with stiletto heels and again matching the gloves and straps
- Weapons – Kitana, C-96 broomhandled pistol, mini-Uzi, dagger
Bodysuit: The quick and easy method: Buy a black lycra/spandex bodysuit in your size then apply the relevant directions below for creating the front and back V’s. With the suit on she measured her body and drew a line from her collar down to just about her pantyline for the front V. In the case of the rear V she made the depth of that one slightly longer than the front. This is to reveal the more cheeky aspect to Molotov.Then following that line she cut straight down almost like making the opening incision in an autopsy. It’s crucially important though that when cutting the V’s to NOT cut a lot of material on your first go around. A single cut straight down will make the stretch material expand outward. From there then you can adjust and gently remove more bits of material as needed. Leave yourself plenty of material so that you can hem those cuts under. She left approximately ¼ inch hem allowance for the front and rear V’s but remember this is stretch material and stretching it too much while sewing will distort the finished product so give yourself enough hem material for you to be comfortable with. In this occasion Joanie created the bodysuit from a neoprene/spandex blend. She wanted something thicker and shiny. The neoprene is a rubbery material often found in wetsuits and gaskets. To make the waist and small of the back even more curvy she added darts (no fellas not the kind of darts you find in bars) to take in more of the fabric and make it more form fitting. Ladies who have worn these bodysuits will know that the material likes to stretch in the straightest most direct lines between points of tension. In this case that would be from the butt to the shoulder blades. Adding the darts forces the material to following the back.
Holsters: Here is a word of wisdom from an experienced cosplayer, Joanie recommends first acquiring your props for the holsters or sheathes. You have any number of weapons you can use but analyzing the show Mol frequently has; a hunting style knife or dagger, a C-96 broomhandle pistol, a mini-Uzi like in “Assassinanny 911” and a Samurai sword. The props, specifically the sword, knife and C-96 all have holsters or sheaths. Using the same stretch vinyl as what you’ll need for the gloveswrap the weapons and measure enough material to cover each with some extra for the seams to be folded and hemmed. Then a thicker, stiffer material can be acquired to act as the rigid portions in a holster which maintain the holster’s shape. This material should be cut out to match the outer red vinyl. So you have 2 materials cut to the same shape. The inner thick material should be sewn to one side of the red stretch vinyl. Now instead of 2 matching patterns you’d have one single piece with thick vinyl on one side and the red stretch material on the other.Then enclosing the thicker material the holster or scabbard would be folded over and sewn shut so that the red stretch material would appear on the outside. The holster straps are made from the red vinyl. One method would be to take lengths longer than what you know you’ll need and fold them over until you have nice uniform edges. For instance the thigh strap for the holster can start as a piece of fabric 20” long by 4” wide. Then create folds on the 4” side, one coming down 1.25” inches and one coming up 1.25” (you lose a partial inch in the bend of the fold). That means you have a 20” length of red stretch material that is only about 1.25-1.35 inches tall but is 3 layers thick. Then sew down the folds to have nice professional edges. You can then wrap that piece around your leg and check the length, cutting off any excess. You will have to employ a method similar to this for each of the straps, the belt and parts of the holster. Some straps, like the ones for the knife which goes on Mol’s arm can be narrower than 1.25 inches so keep your sewing pins handy and adjust the widths to meet your own aesthetic tastes. For the belt again the same matching red was used but rather than just folding it over again a more supportive material was inserted (like the holsters) and used as a partial spine so that the belt wouldn’t be flimsy.
Gloves: Get 3 yards of materials so that you can make the holsters and gloves all from the same material. With the gloves Joanie also made those from scratch. Place out you hand and arm spreading your fingers onto a large sheet of paper, or sheets of paper taped together to accommodate your hand and arm with enough extra space so that you can trace. Then trace out your hand and arm, if you are a good freehand artist you can automatically just draw and image of your arm and hand about ½ – ¾ of an inch away from your fingers and arm. If you directly traced your arm then you should now create a duplicate tracing but make it outside that first tracing and again set it ½ -3/4 of an inch away from the original tracing. Why so far out? This is the extra material you’ll need to both wrap your hand AND have enough to sew to. Now for the thumb specifically, imagine where your life line is on your palm. That long curved line which isolates your thumb from your hand. Mimic that on your drawing and then when you go to cut out your traced hand and arm be sure to also remove the thumb cutting along that imaginary life line. With you paper pattern made trace it out four times onto your red stretch vinyl. Be sure you have two sets facing each direction otherwise you might end up with 2 left gloves or 2 right gloves. It helps prevent confusion if you cut these individually as in thinking to yourself “this is the left hand… and this is the right hand”. Now you should have four pieces of material cut resembling 4 fingered hands and partial arms. With the facial side, the side you want to be seen, facing toward each other and all the fingers and arm sections line up between sewing the outer edge of your glove. Follow around the edges and be sure to back stitch and reinforce between the fingers and wrists. Since these areas bend the most on our hands the gloves will have the most stretch and wear here.
Boots: Mol’s boots can be bought ready to go but if you have the chance you might want to bring a sample of the glove material with you as you shop for the boots. That way you can try and get the best color match possible. If you’re shopping online then you’re at the mercy of the color of the screen and accuracy of color correction of the camera that took the sample photos. Still there are plenty of boots out there that will work.
Written by John McDonald with Joanie Mars, Venture Bros. Cosplay
Discuss this story in our Venture Forums! Follow @VentureBrosBlog on Twitter and be sure to “LIKE” us on Facebook for the latest Venture Bros. news!
[Venture Bros. Blog]Related Posts